by Allan Cochrane | Nov 22, 2018 | Munchies, Recipes, Sides
Hummus
Prep Time10 mins
Total Time10 mins
- 15 oz can of chickpeas or 1 1/2 cups (250g) cooked chickpeas
- 1/4 cup (60ml) fresh lemon juice (1 large lemon)
- 1/4 cup well-stirred tahini
- 1 small garlic clove, minced
- 2 tbsp (30ml) extra-virgin olive oil, plus more for serving
- 1/2 tsp ground cumin
- 2-3 tbsp (30-45ml) water
- Dash ground paprika, for serving
- Salt to taste
In the bowl of a food processor, combine the tahini and lemon juice and process for 1 minute. Scrape the sides and bottom of the bowl, then process for 30 seconds more, making the hummus smooth and creamy.
Add the olive oil, minced garlic, cumin and a 1/2 teaspoon of salt to the whipped tahini and lemon juice. Process for 30 seconds, scraping the sides and bottom again, then process another 30 seconds or until well blended.
Open, drain and rinse the chickpeas. Add half of the chickpeas to the food processor and process for 1 minute. Scrape the sides and bottom of the bowl, then add the remaining chickpeas and process until thick and quite smooth for 1 to 2 minutes.
Most likely the hummus will be too thick or still have tiny bits of chickpea. To fix this, with the food processor turned on, slowly add 2 to 3 tablespoons of water until you reach the perfect consistency.
Taste for salt and adjust as needed. Serve hummus with a drizzle of olive oil and dash of paprika. Store homemade hummus in an airtight container and refrigerate up to one week.
by Allan Cochrane | Nov 22, 2018 | Condiments, Lunch Recipes, Munchies, Snack Recipes
Hummus
Prep Time10 mins
Total Time10 mins
- 15 oz can of chickpeas or 1 1/2 cups (250g) cooked chickpeas
- 1/4 cup (60ml) fresh lemon juice (1 large lemon)
- 1/4 cup well-stirred tahini
- 1 small garlic clove, minced
- 2 tbsp (30ml) extra-virgin olive oil, plus more for serving
- 1/2 tsp ground cumin
- 2-3 tbsp (30-45ml) water
- Dash ground paprika, for serving
- Salt to taste
In the bowl of a food processor, combine the tahini and lemon juice and process for 1 minute. Scrape the sides and bottom of the bowl, then process for 30 seconds more, making the hummus smooth and creamy.
Add the olive oil, minced garlic, cumin and a 1/2 teaspoon of salt to the whipped tahini and lemon juice. Process for 30 seconds, scraping the sides and bottom again, then process another 30 seconds or until well blended.
Open, drain and rinse the chickpeas. Add half of the chickpeas to the food processor and process for 1 minute. Scrape the sides and bottom of the bowl, then add the remaining chickpeas and process until thick and quite smooth for 1 to 2 minutes.
Most likely the hummus will be too thick or still have tiny bits of chickpea. To fix this, with the food processor turned on, slowly add 2 to 3 tablespoons of water until you reach the perfect consistency.
Taste for salt and adjust as needed. Serve hummus with a drizzle of olive oil and dash of paprika. Store homemade hummus in an airtight container and refrigerate up to one week.
by Allan Cochrane | Nov 22, 2018 | Craft Recipes, Munchies
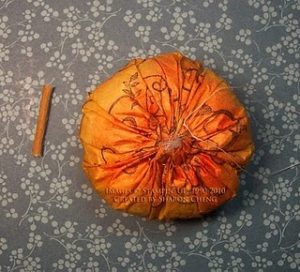
Coffee Filter Pumpkin
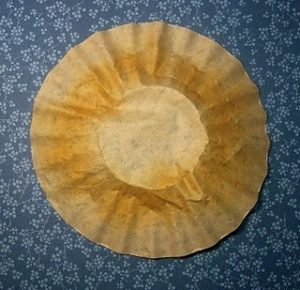
I used a brown coffee filter for this project. You can make a pumpkin with brighter colours if you use a white coffee filter.
The coffee filters used in this projects are about 8" in diameter. They are the 8-12 cup size that you find in grocery stores. To make larger pumpkins, you can use the larger commercial coffee filters. You may be able to find them in restaurant supply stores. I use Stampin'Up! products, so their names are here, but i have also put a rough colour translation there for you.
Supplies:
Stamp Sets: Fabulous Phrases, Baroque Motifs (I use any swirly stamp set when doing with a group, we all have different ones - use what you like).
Classic Ink Pads: More Mustard (a deep yellow), Tangerine Tango (softer orange), Old Olive (olive green), Elegant Eggplant (Eggplant/Aubergine colour - rich purple).
Card Stock: More Mustard (one that matches your yellow ink)
Punches: Small Oval, 1/6" hole punch.
Big Shot and Leaves #2 Die (or any die cutting system and a leaf framlit to make it easy.
Ribbon: Old Olive 1/8" Taffeta (matches your green, or go with any of the colours you used)
Linen Thread
Multipurpose Liquid Glue
Mini Glue Dots
Small Twig
Coffee Filters: One brown (unbleached) and one white.
Polyester Fiberfill
Needle and Thread
Washer (I used one that is slightly smaller than 1" in diameter.
Instructions
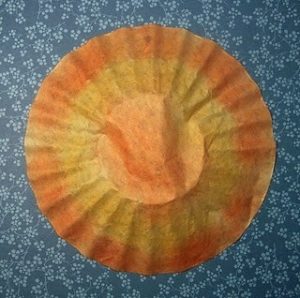
Step 1. Sponge More Mustard on the coffee filter.
Step 2. Sponge Tangerine Tango on the coffee filter.
Step 3. With Elegant Eggplant, stamp Baroque Motifs on the coffee filter.
Step 4. Using a needle and thread, baste around the edge of the filter. I used stitches that were about 1/4" long and basted a little more than 1/4" away from the edge.
Step 5. Glue a small washer in the center of the inside of the filter. The weight of the washer will help keep your pumpkin from rolling around. I glued a piece of coordinating card stock between the washer and the coffee filter since the filter is so thin.
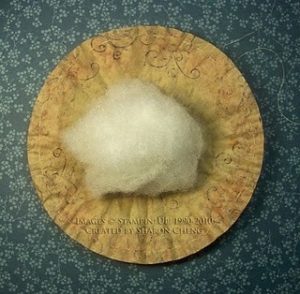
Step 6a. Put a piece of polyester fiberfill in the center of your pumpkin.
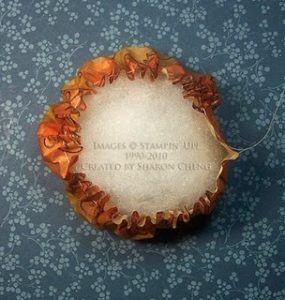
Step 6b. Pull the basting thread to gather the pumpkin around the fiberfill. Adjust the gathers while you are tightening the thread so that it gathers up evenly. Add or remove fiberfill to fit your pumpkin.
Step 7. Tie off the basting thread. You can see the twig on the side that will use in the next step.
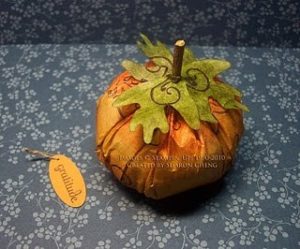
Step 8. Glue the twig into the center of the pumpkin.
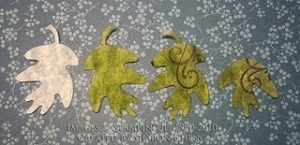
Step 9. I took the smaller white coffee filter, and sponged it green, then stamped the swirls on it, folded it in half and put it through the Die cut machine which gave me 4 leaves using your Big Shot and the Leaves #2 Die.
Step 10 and 11. Glue the leaves to the twig. I used Stampin'Up!'s multipurpose liquid glue. Stamp a greeting, I have done Gratitude on a piece of More Mustard Card Stock and punch with the small oval. Use the 1/16" hole punch and add a piece of linen thread.
Step 12. Tie a piece of thin ribbon on the twig while also adding the tag. I used a mini glue dot to hold the ribbon onto the twig.
by MammaT | Nov 10, 2018 | Breakfast Recipes, Munchies, Snack Recipes
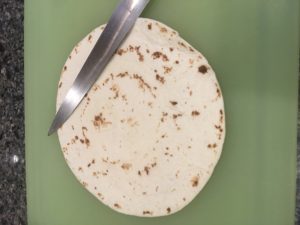
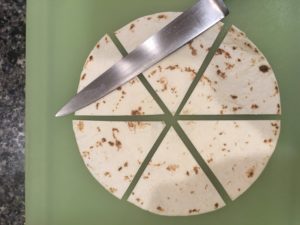
Cinnamon Tortillas
A quick but delicious snack, a great way to use up leftover tortilla or just fill up empty tummies after a day at school.
Prep Time5 mins
Cook Time3 mins
Total Time8 mins
Course: Snack
Cuisine: Mexican
Keyword: breakfast, cinnamon sugar, munchies, quick snack, snacks, tortilla
Servings: 4 people
Cinnamon Sugar
- 2 tsp cinnamon powder
- 4 tbsp caster sugar
Preparing the tortillas
Place the tortillas on a chopping board in a pile.
Cut the tortillas into triangles.
Put oil into a deep frying pan, no more than 1/3 full. Heat it up to 350°F
Carefully place 4 or 5 triangles in the hot oil, turn over after 20 seconds, lift out after another 20 seconds.
Place on kitchen paper, set on a wire rack.
Move quickly to the bowl of cinnamon sugar.
Preparing the cinnamon sugar
by MammaT | Mar 18, 2018 | Craft Recipes, Munchies
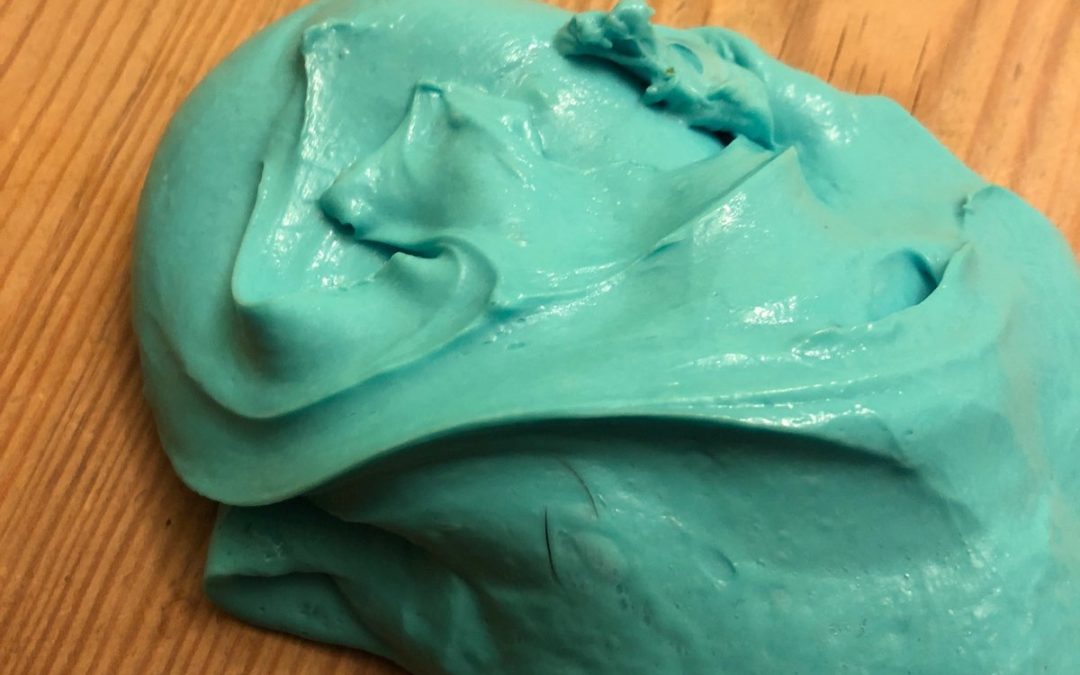
Fluffy Slime Recipe
Prep Time6 mins
Total Time6 mins
- 1/2 cup White Glue
- 3 or 4 cup Shaving Cream
- 1 tbsp Saline
- 1/4 tsp Baking Soda
- 1 tsp Baby Oil
- Assorted Food Coloring
Add 1/2 cup of glue into a bowl.
Add color - just a few drops a light color or more for a darker color.
Stir to mix in the color.
Add approximately 3 cups of shaving cream into the bowl. You can add another cup if you feel like it is not fluffy enough.
Stir in 1/4 tsp of baking soda.
Add 1 tbsp saline solution and mix.
Mix thoroughly and knead mixture.
This is when it turns into slime!
Add in as much baby oil as you need to make the slime less sticky.
Have fun!

by MammaT | Mar 11, 2018 | Munchies, Recipes, Sweet Bites
Mum’s Scones (Biscuits)
- 8 oz Plain Flour (All Purpose)
- 1 tsp Bicarb of Soda
- 2 tsp Cream of Tartar (If you have soy milk, only use 1 tsp)
- 2 oz Butter (chilled)
- 5 oz Milk and Water Mix
- 1 pinch Salt
Mix and sieve flour, bicarb, cream of tartar and salt.
Rub in butter to resemble breadcrumbs.
Add liquid until all combined and ?
Cut into squares, use a cutter, etc.
Place a baking sheet and back for 10 minutes max. (Less for small ones) in over at 400 degrees.
You can add 4 oz strong cheese after 2.
Yields 12 large/ 24 small